Quick Answers
Manage Campaigns
Edit Content
Video Tutorials
- EDM Generator - Tutorial (EN)
- EDM Generator - Tutorial (CH)
- How to Create A Campaign
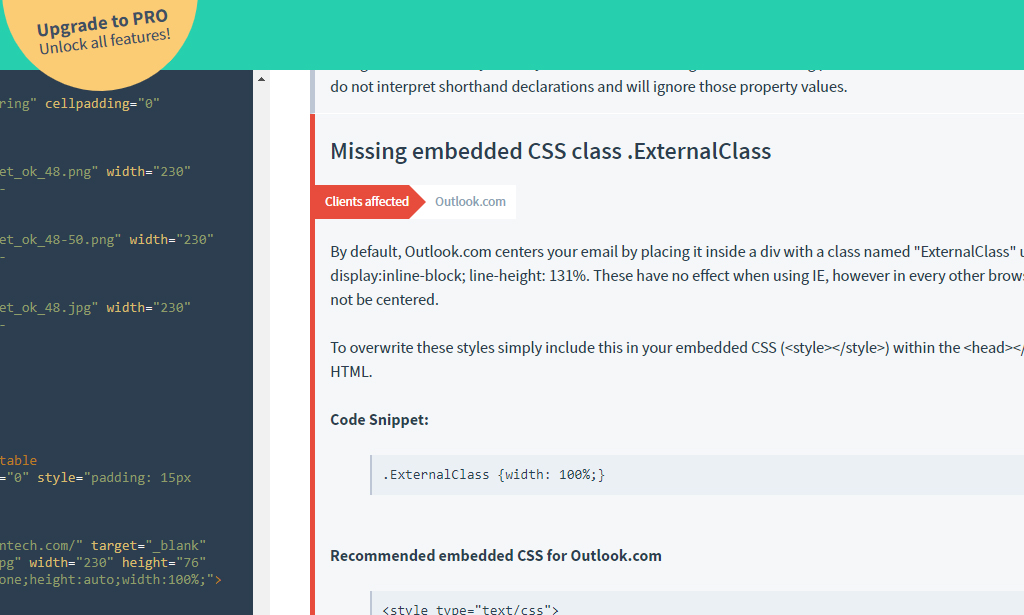
HTML Validation
HTML Email Check and Validation Tool
1. go to the check code page, copy & past the email code in the edit area
2. click on the check code button to get the instant validation results
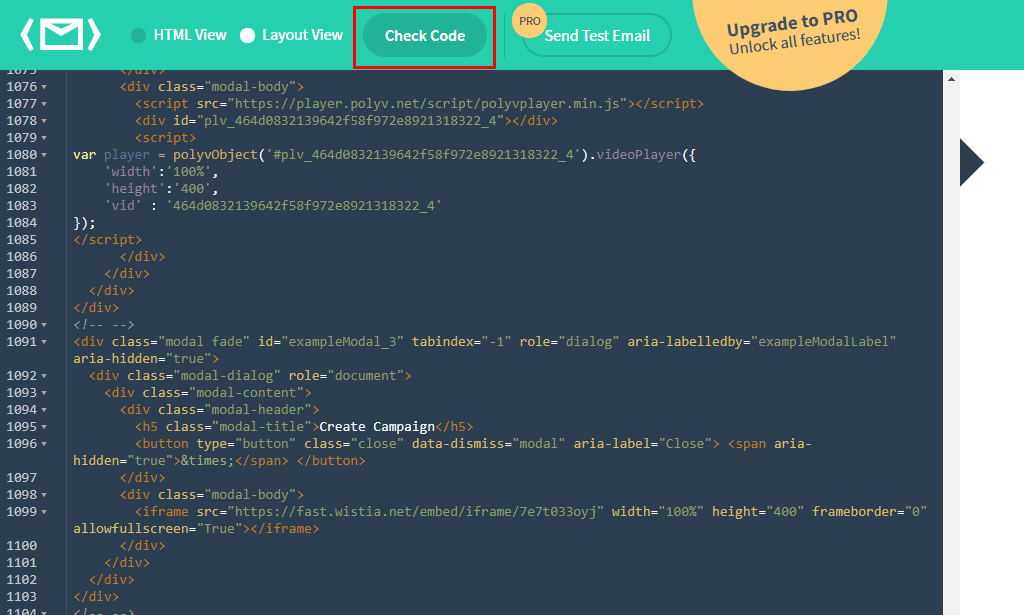
3. review the resut and fixed the red errors.
4. the red errors must be fixed if the effected clients is one of the major email clients as list below
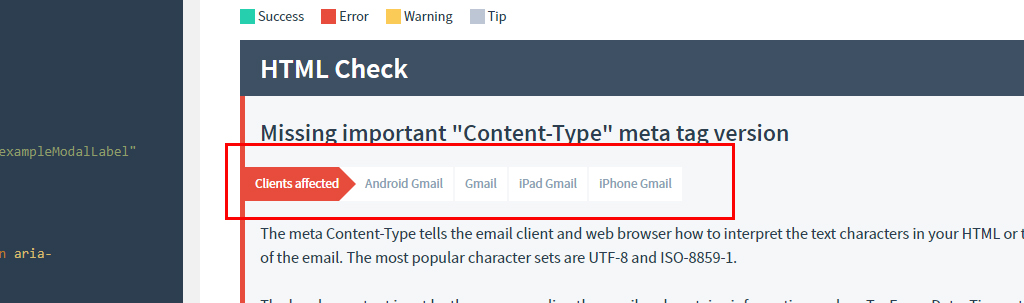
Major email clients
| Desktop | Webmail | Mobile |
|---|---|---|
| Outlook 2000–03 | Gmail | Android Mail |
| Outlook 2007–16 | Outlook.com | iOS Mail |
| Outlook Express | Gmail Android/iOS app | |
| Windows 10 Mail | Outlook Android/iOS app |
Never send another broken or invalid coded HTML email. Start Check Code
Manage Campaigns
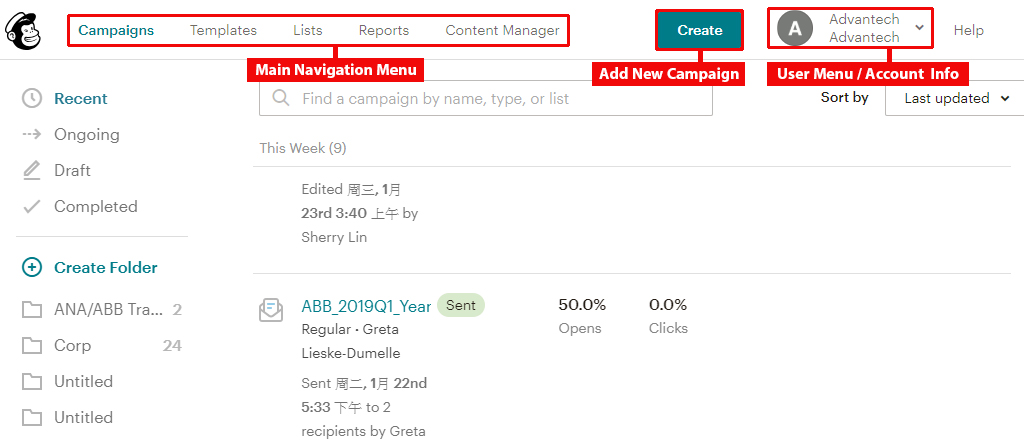
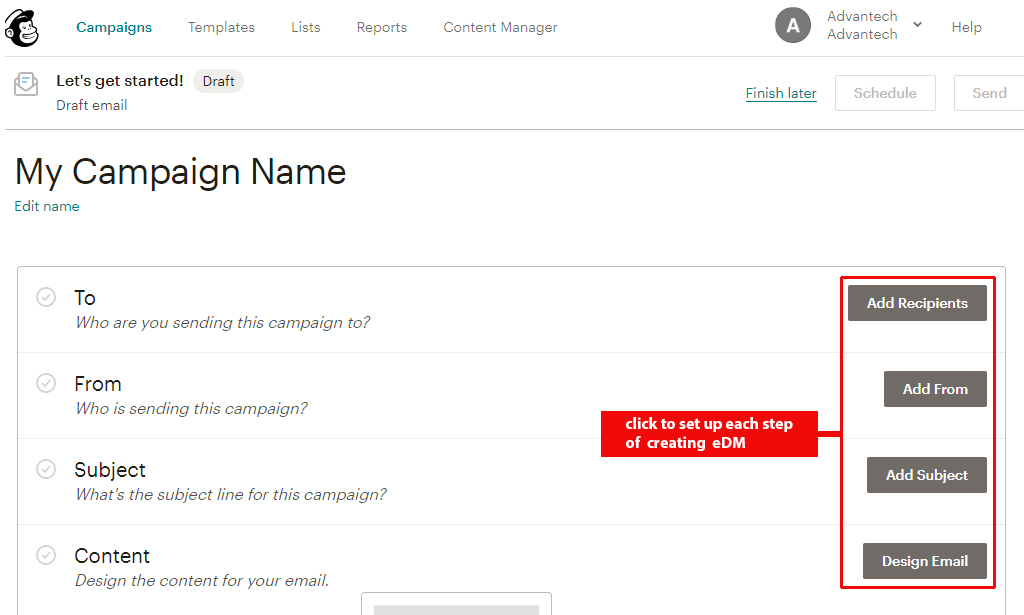
What're the important features on the Campaign page?
You can access to each page from the header menu, and view the user information from the upper right hand side. To get started, click the "Create Campaign" button from the Campaign page or Dashboard page.
The MailChimp campaign builder would walks you through building a campaign, step by step.
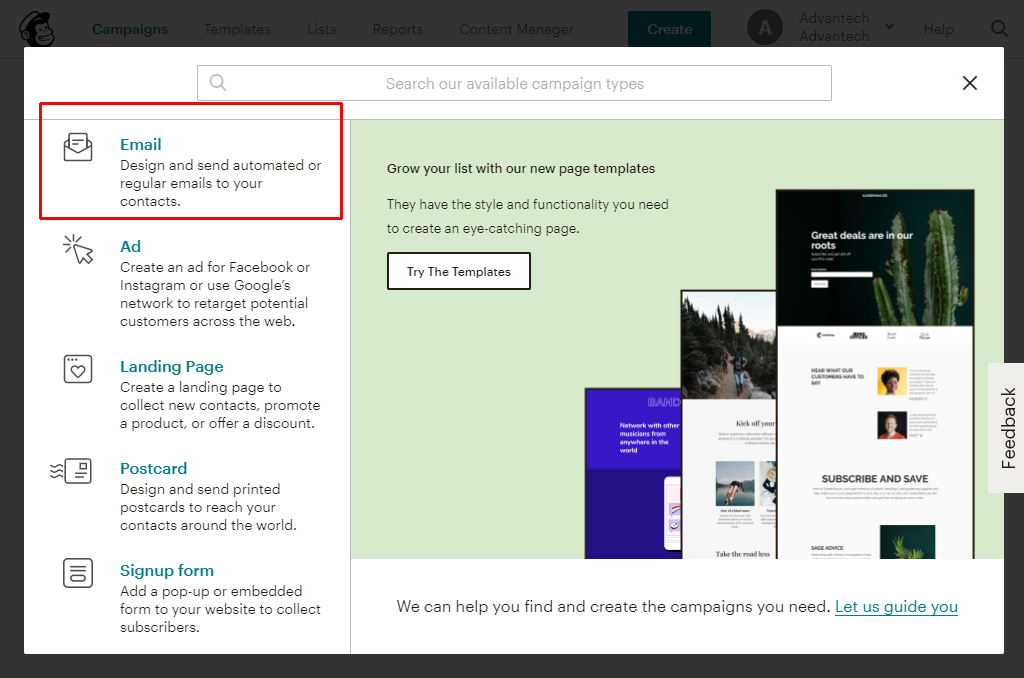
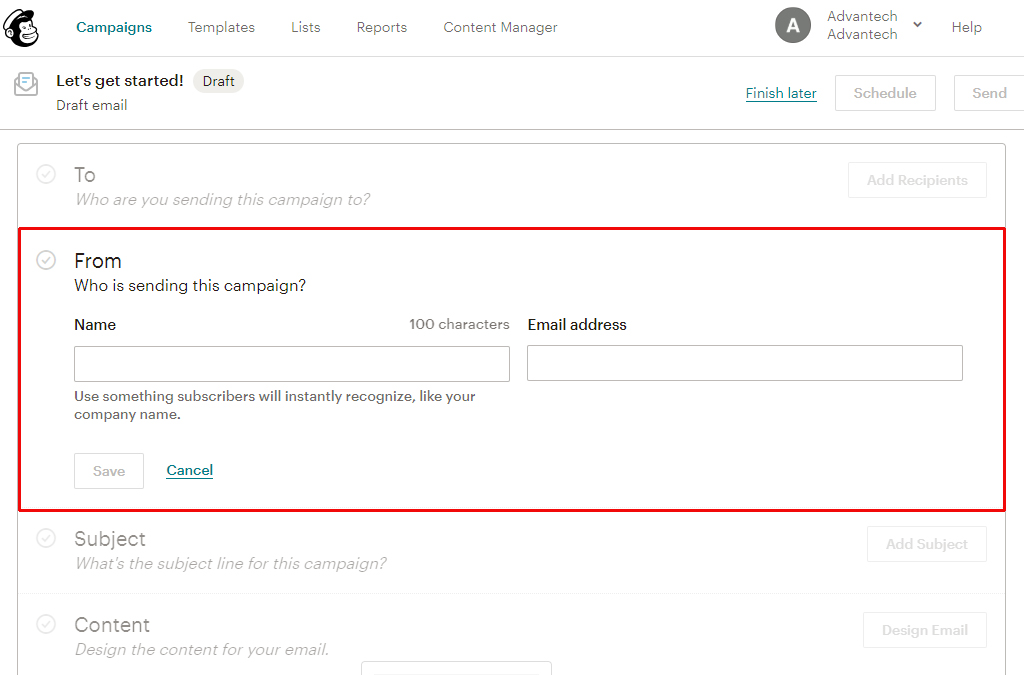
How can I create a campaign ?
1. To get started, click the "Create Campaign" button from the Campaign page or "Create" from the navigation bar
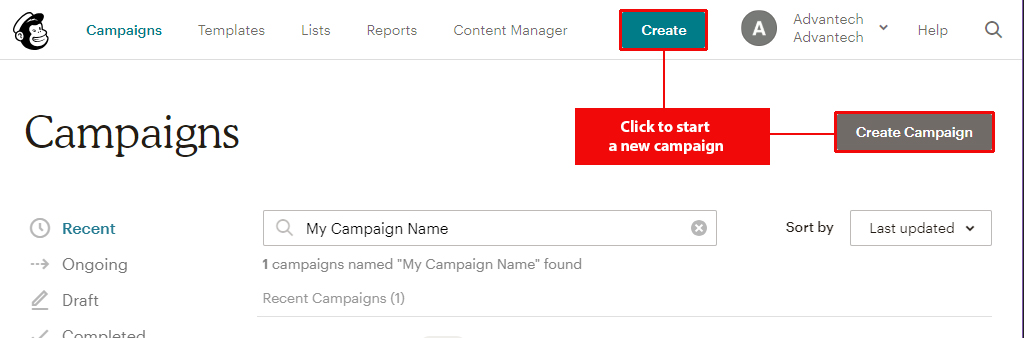
2. Select "email" to start the eDM generation process
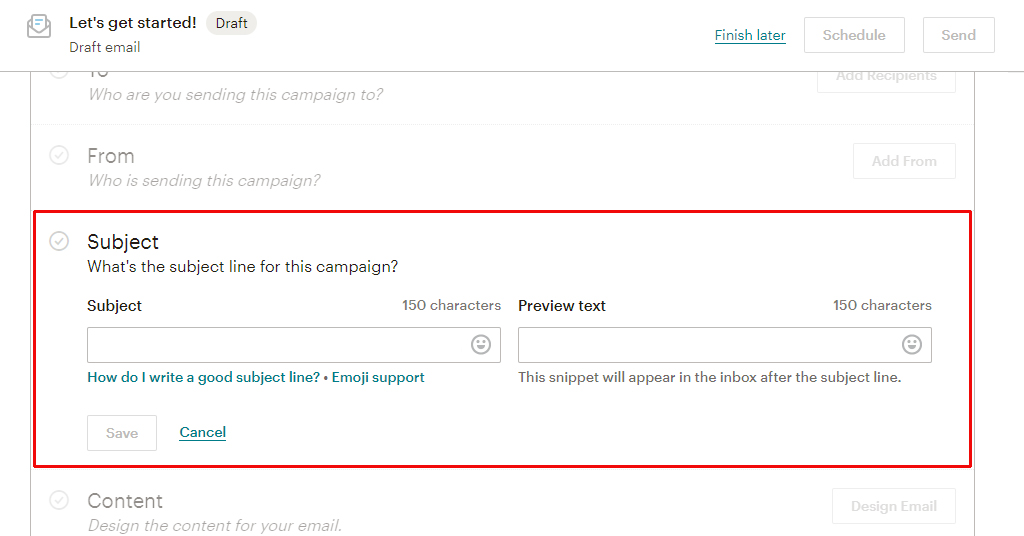
4. Please enter the required information (Sender's info, Email subject).
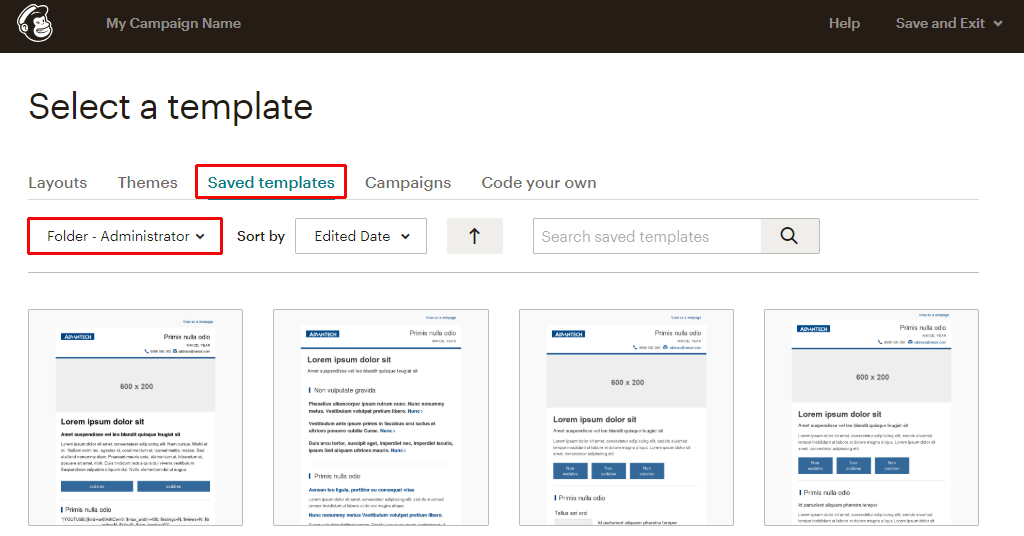
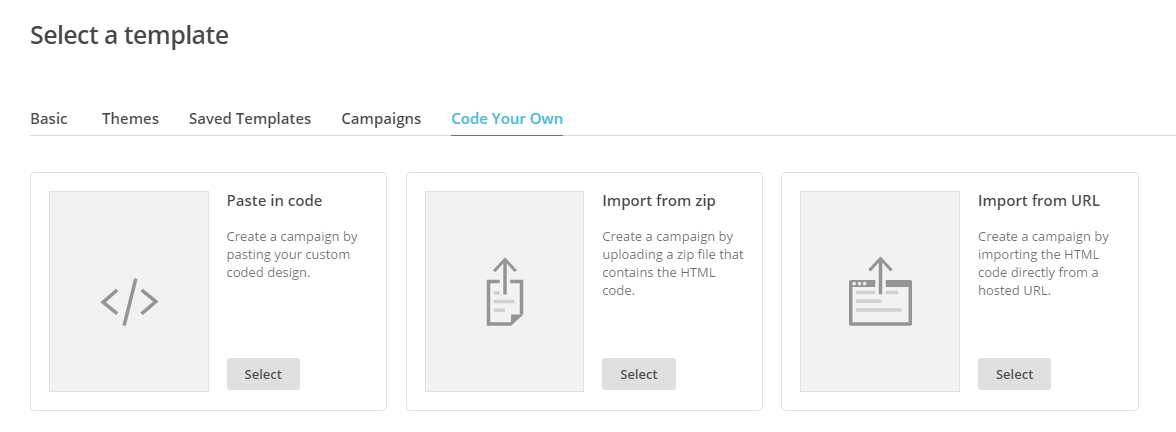
5. In the "Select a template" step, please select " Saved Templates" tab
6. And choose your BU folder from the drop-down menu
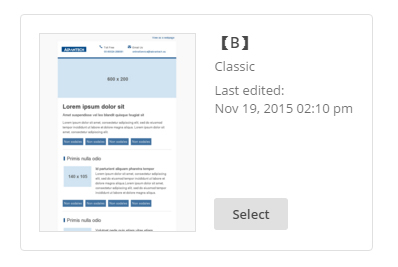
7. You'll find the templates in the foler, click on the "Select" button to apply the template to your eDM
How to move campaigns into folders?
To move campaigns into the folders you created, follow these steps.
1. Navigate to the Campaigns page
2. Check the box next to each campaign or report you want to add to a folder.
3. Click "Move To" button, and click the name of the folder where you want to move the campaign to

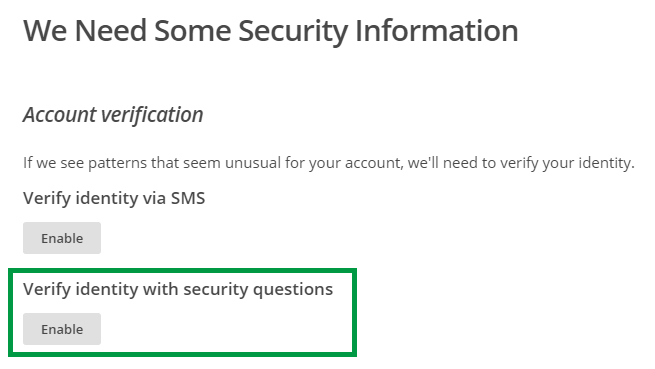
What is the security question for validation check?
Whenever mailChimp supspect an unusal logging activity, it will ask you to whether you'd like to verify your identity via SMS or choose a preseted security question. You may skip the validation for couples time, but evntually it will lock you out until you complete the security qutstion check
1. Choose "Verity identiy with security questions"
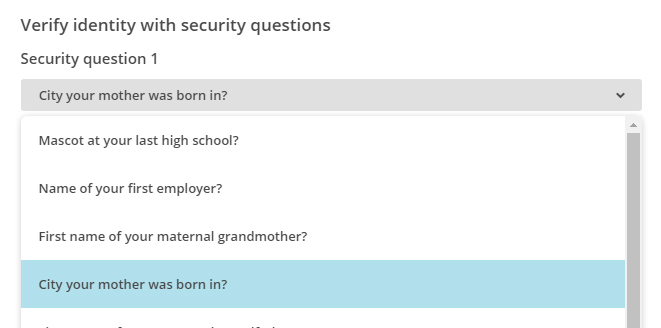
2. Select "City your mother was born in?" from the drop-down menu
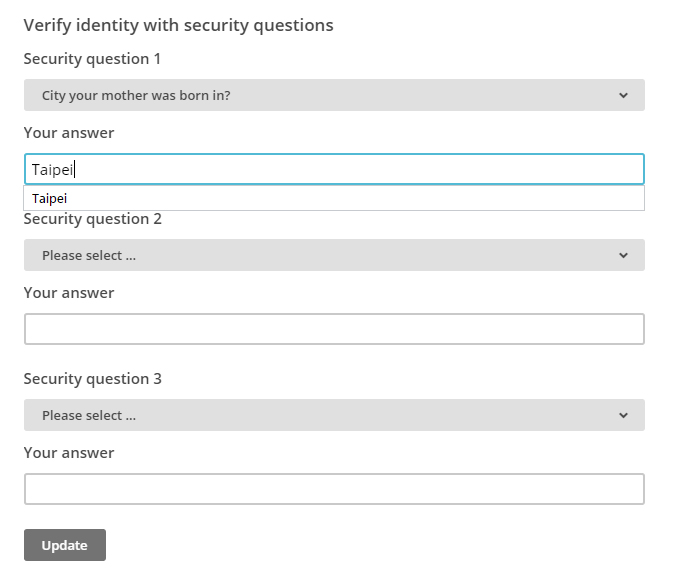
3. Type "Taipei" as answer and clik the "Update" button to complete the validation check
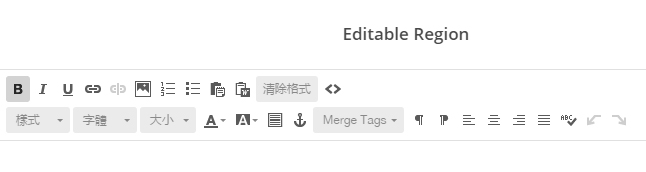
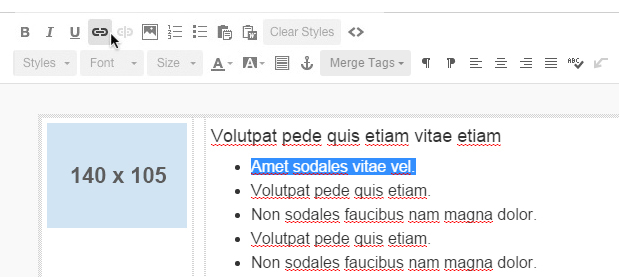
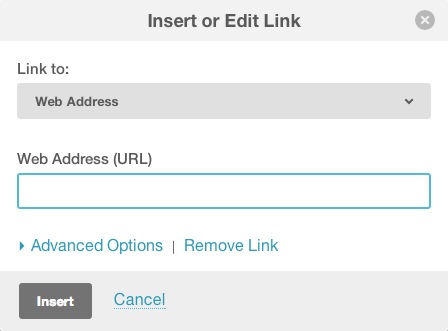
How can I add hyperlink to the text?
1. Click on editable content blocks in your layout from the left panel
2. Highlight text in the text editor from the right panel
3. Click on the "Link" icon in the toolbar
4. In the "Insert or Edit Link" pop-up modal, select the "Link to" type from the drop-down menu
5. And type your link in the "Web Address (URL)" field

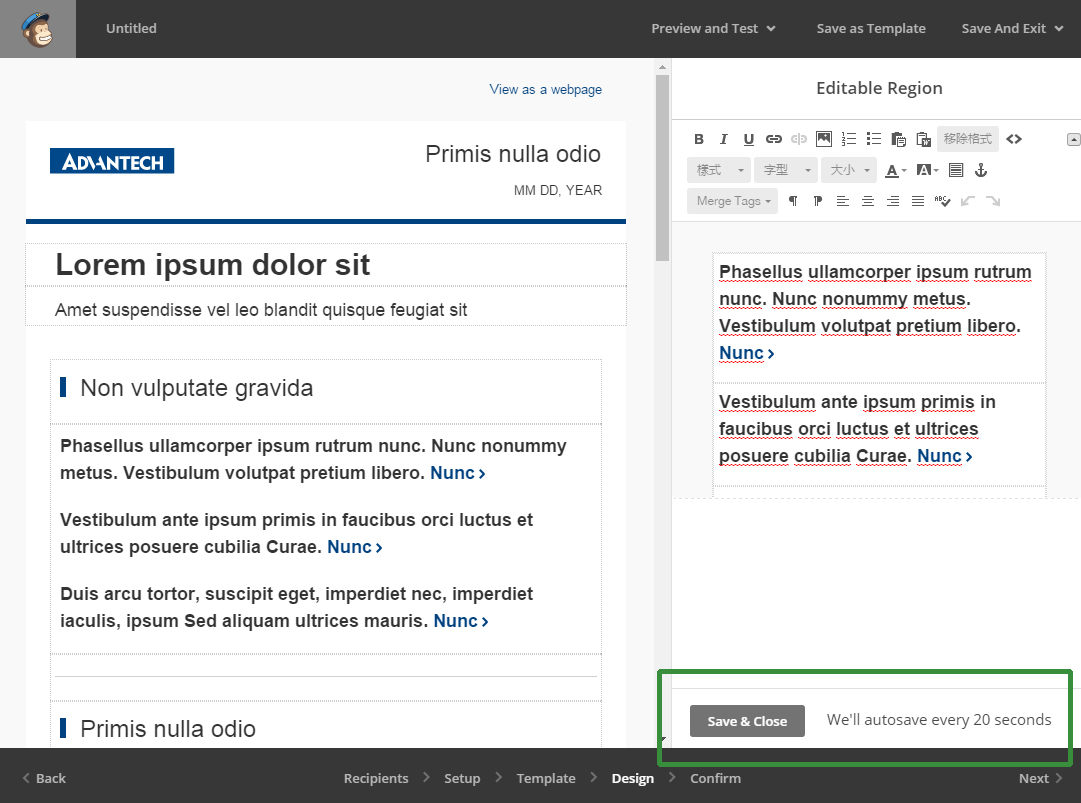
How can I preview the eDM while I'm editing?
To enter "Preview mode", follow these steps.
1. Navigate to the "Design" step of the Campaign Builder
2. Click the "Preview and Test" drop-down menu in the upper-right corner, and choose "Enter Preview Mode"
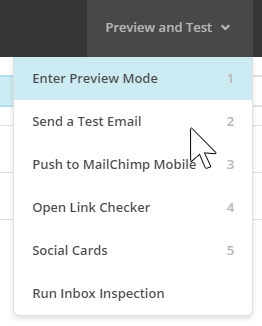
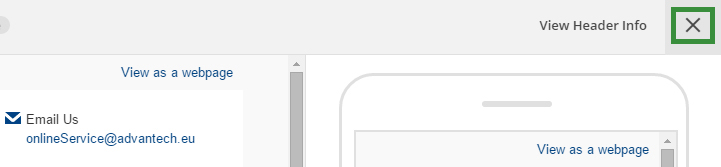
3. To exit from the preview mode, click ont the close icon on the upper-right corner
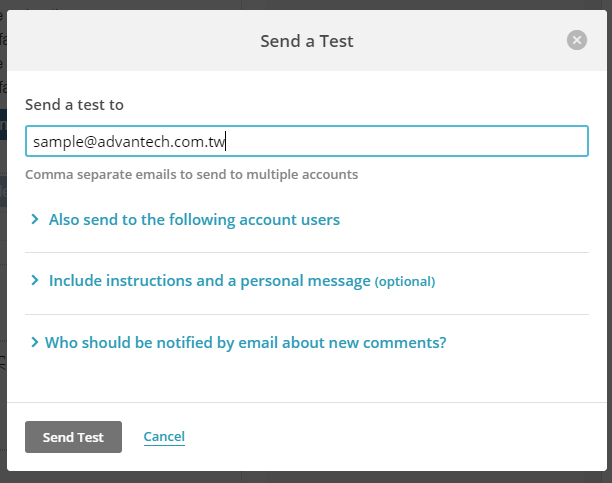
How can I send the test emails?
To send a test email from the Campaign Builder, follow these steps.
1. Click the "Preview and Test" drop-down menu, and choose "Send a Test Email"
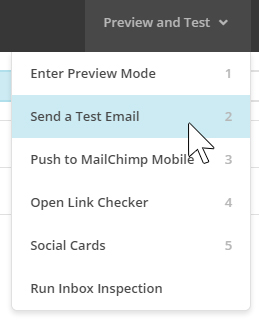
2. Type the email address you want to send the test to. You also have the option to use the checkboxes to send to other users on your account.
Why can't I send test email?
Test emails count toward your monthly email sending limit, meaning you can send tests to 6 email addresses at a time and you can send 12 tests per campaign or 24 tests per account per 24 hours whichever comes first
The number of test emails sent from an account is based on the number of email addresses sent to. For example, if you send a single test email to five email addresses at once, it counts as five sends rather than one.
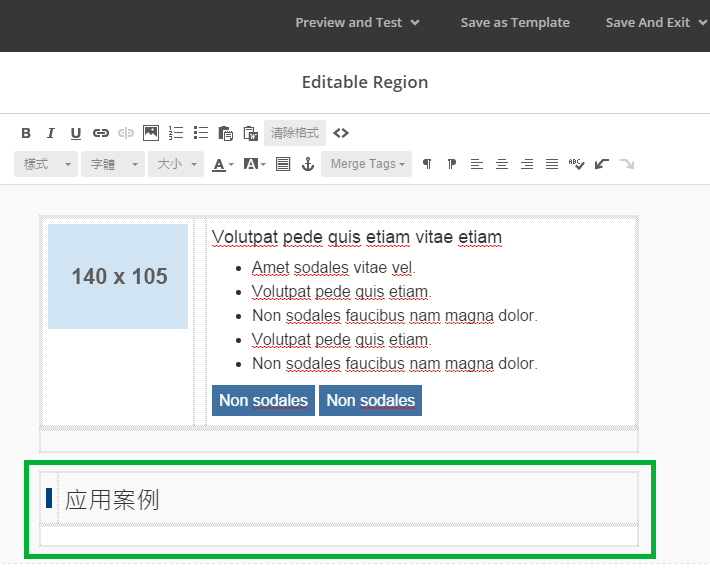
How can I add a title block?
1. Navigate to the "Design" step of the campaign builder
2. Click on editable content blocks in your layout from the left panel
3. Highline and copy (Ctrl+C) the title block from the right panel
4. Click on where you want the title block to be and hit enter to create a new breakline
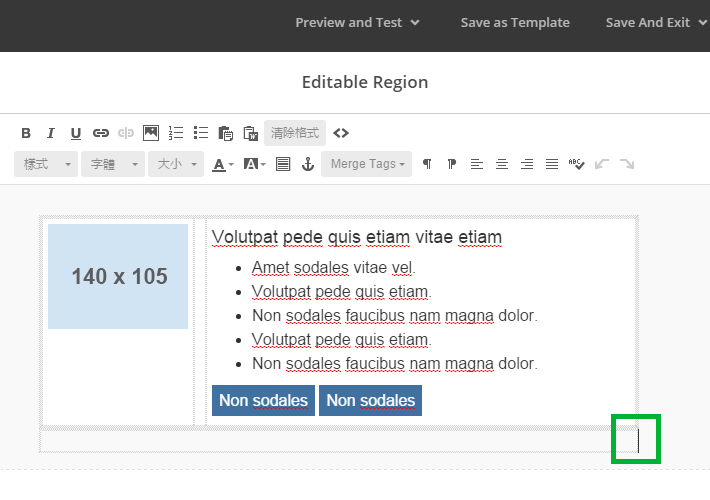
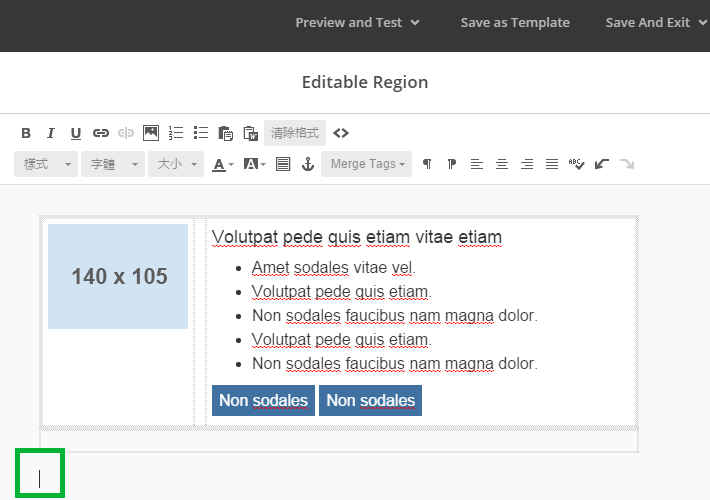
5. Make sure the "I" bean is where the title block will be and paste it (Ctrl+V)

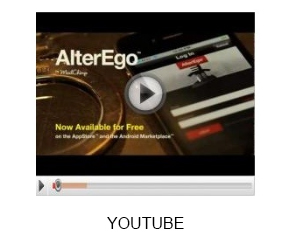
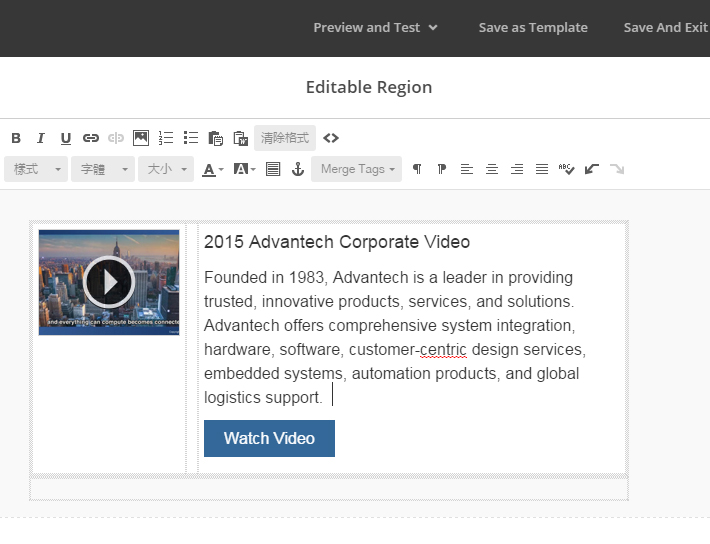
How to auto-convert embedded videos?
Most email clients can't display embedded video content, and will strip the code from your campaign. When you create a campaign in MailChimp, you can link an image, or use merge tags to share a thumbnail image of the video that links to the video's URL.
Video merge tags work with popular video hosting services, including Vimeo, YouTube, Maker.tv, Vzaar, and Wistia.
Rather than embed video directly into an email, video merge tags generate a thumbnail image of a video player and link it to your video online. Although the video can't play directly in an email program, the video player image mimics an online player, with a play button and progress bar. When a subscriber clicks the thumbnail, they can watch the video in a new browser window.
Basic Format
All video merge tags require you to enter some specific information about your video. The video merge tag uses the following format.
*|YOUTUBE:[$vid=fj77lSG6Bl8, $max_width=300, $ratings=N, $views=N, $border=N, $title=N, $trim_border=N]|*
Which services support which options?
Some services support certain parameters, and others don't. This handy chart identifies which parameters can be used in a particular service's video merge tag.
| Service | max_width | title | border | trim_border | ratings | views | watch_url |
|---|---|---|---|---|---|---|---|
| BLIPTV | yes | yes | yes | yes | no | no | no |
| VIMEO | yes | yes | yes | yes | yes | no | no |
| VZAAR | yes | yes | yes | yes | no | no | no |
| WISTIA | yes | yes | yes | yes | no | no | yes |
| YOUTUBE | yes | yes | yes | yes | yes | yes | no |
Examples

How to manually link an image to video?
1. Edit text and insert link on the button
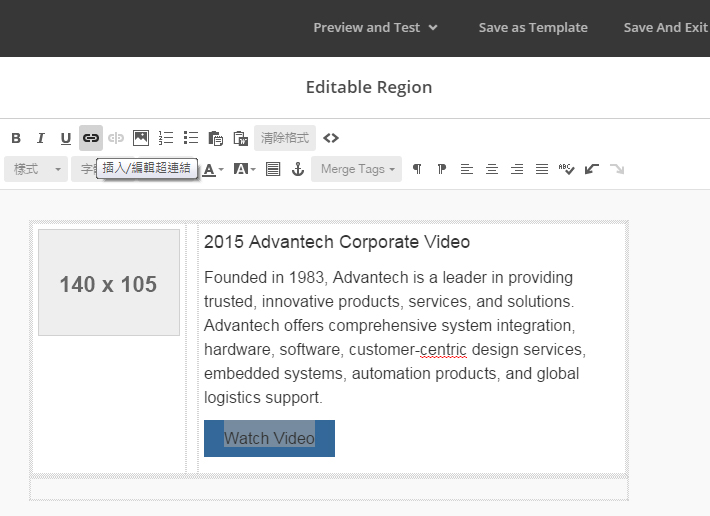
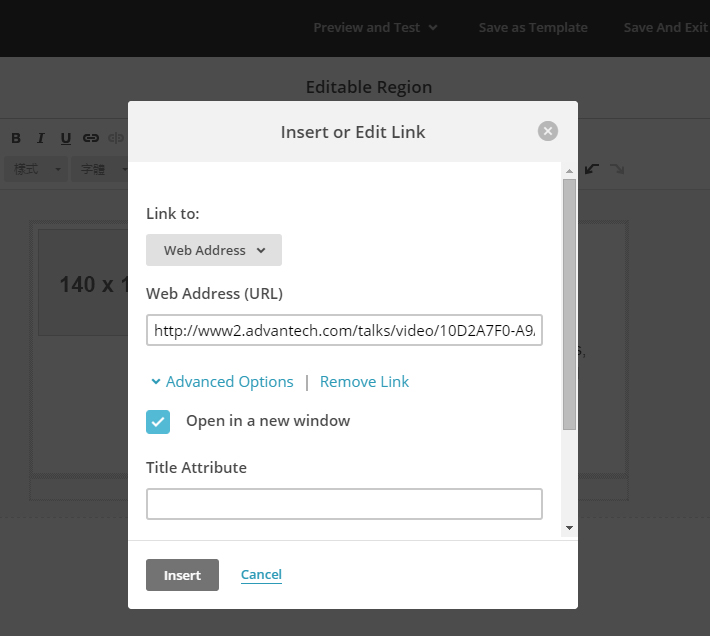
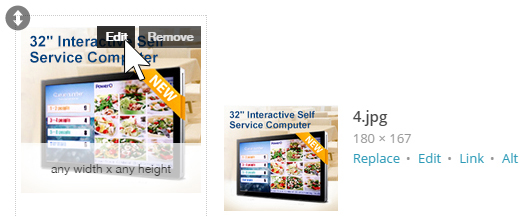
2. Click on the image from the content block to open the "File Manager" pop-up modal
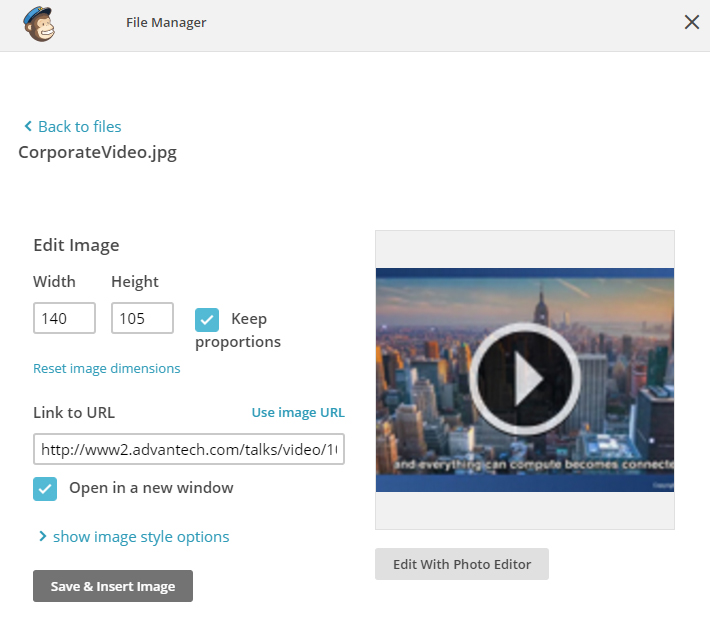
3. Select a image to display as video screenshot or upload a new image from your computer
4. On the "Edit Image" screen, set optional image properties and click on "Save & Insert Image"
Edit Image
How can I upload a image?
1. Navigate to the File Manager
2. Drag and drop the image from your computer onto the File Manage page
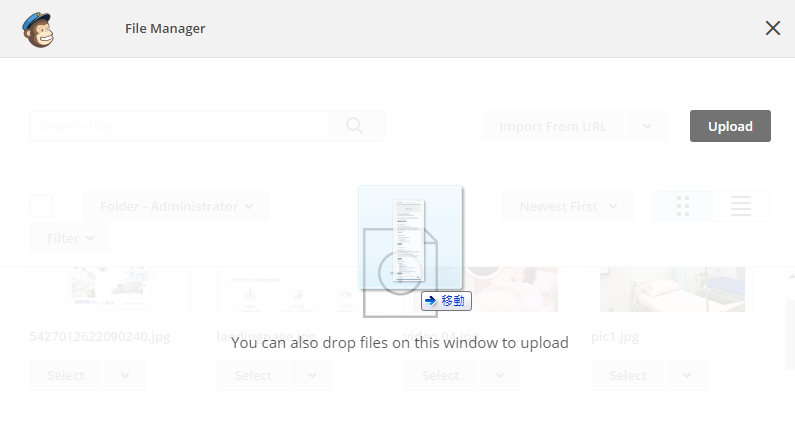
3. You can also click "Browse" to select a file and upload it from your computer, or choose "Import From URL"

Please help to manage uploaded images into folders and it'll help to find images faster!

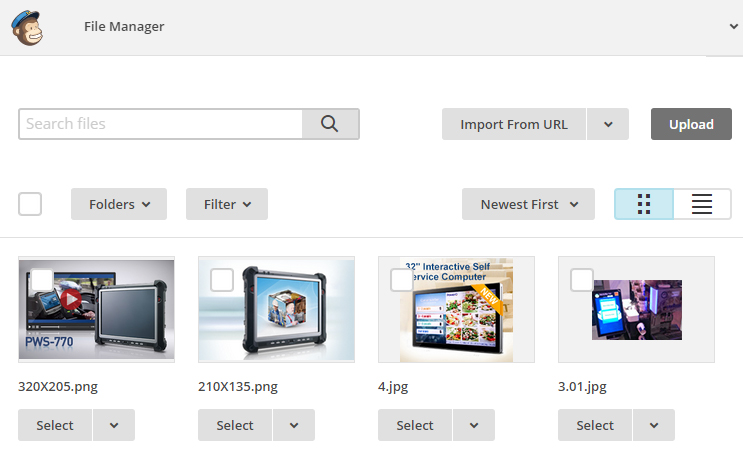
How can I resize a image?
1. Navigate to the File Manager
2. Click "Select" for the image you want to add to the content block.
3. On the "Edit Image" screen, please change the image properties, and click the "Save & Insert Image" button to save the image setting
3. You can "browse", "filter", "sort", or "search" for your image and click "Select" button
Export Campaigns
How can I replace a GIF image?
Some email clients don't support animated GIFs, but if you would like to include a GIF in your campaign, you can upload an animated GIF. Because versions of Outlook from 2007 to the present use Microsoft Word to render HTML email, GIFs and animated content don't display well. Compatibility issues cause only the first frame of the GIF to display.
To accommodate for this, we recommend that you produce your file so that the first frame contains the important information. When you're designing emails that contain animated content, always plan for how to minimize the impact on the overall campaign if the animated content fails.
Click here for additional helpful information on animated GIFs and which email clients support them.

Export Campaigns
How to export the eDM in HTML format?
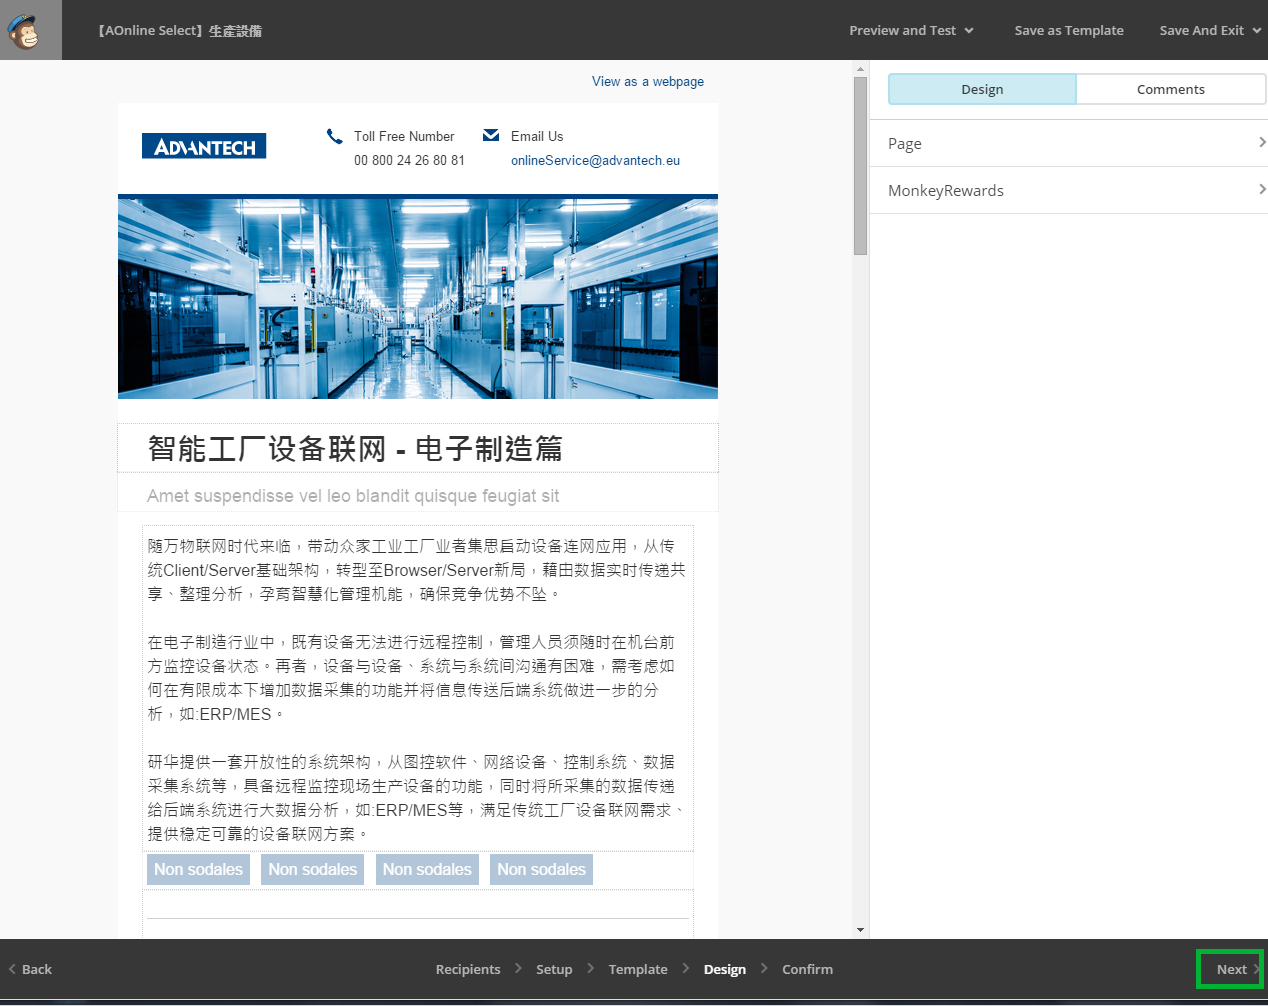
1. Click on "Next" from the bottom right corner to go to the last step in the campaign builder
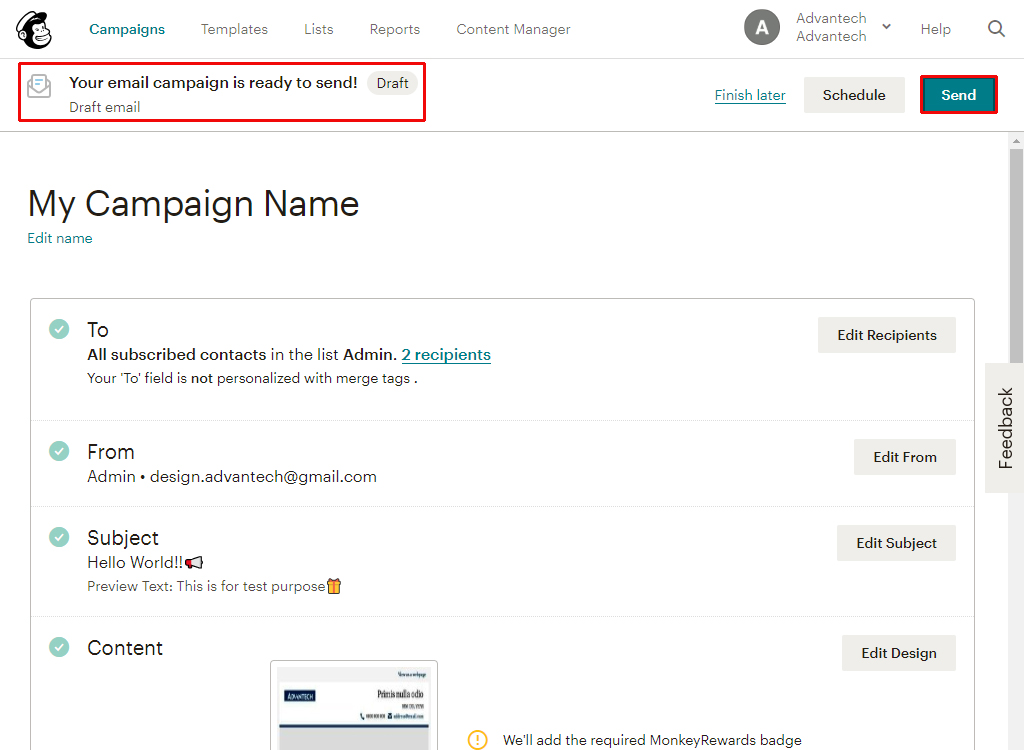
2. On the "Confirm" step, go ahead click on the "Send" button
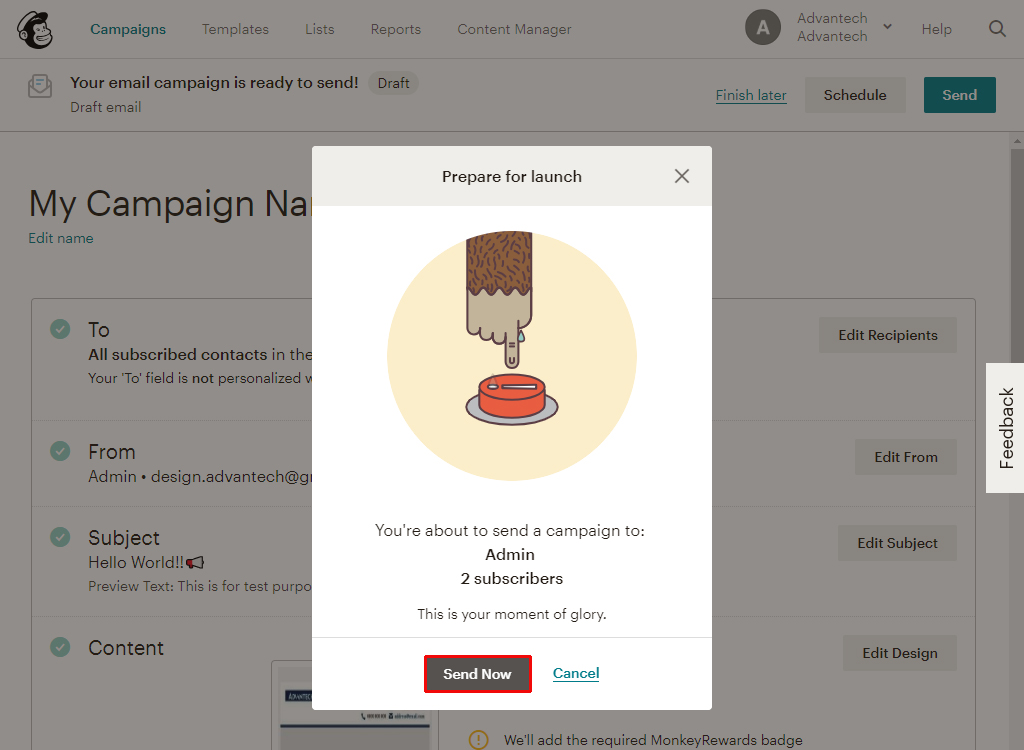
3. Cick on "Send Now" button
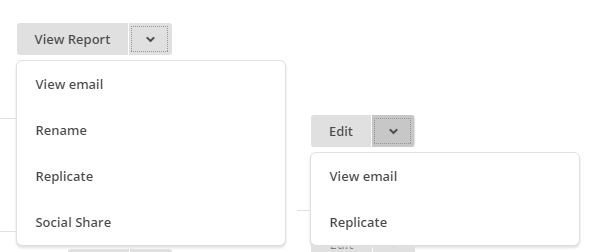
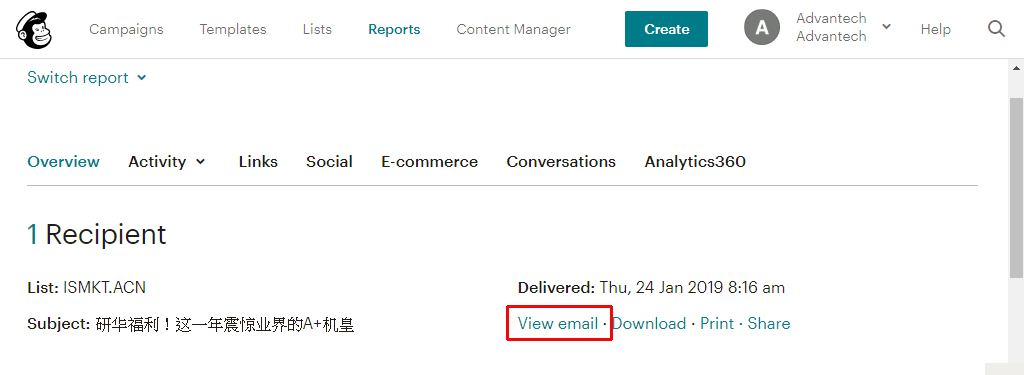
4. Return to the Campaigns page and find the sent campaign now has a "View Report" button on the right
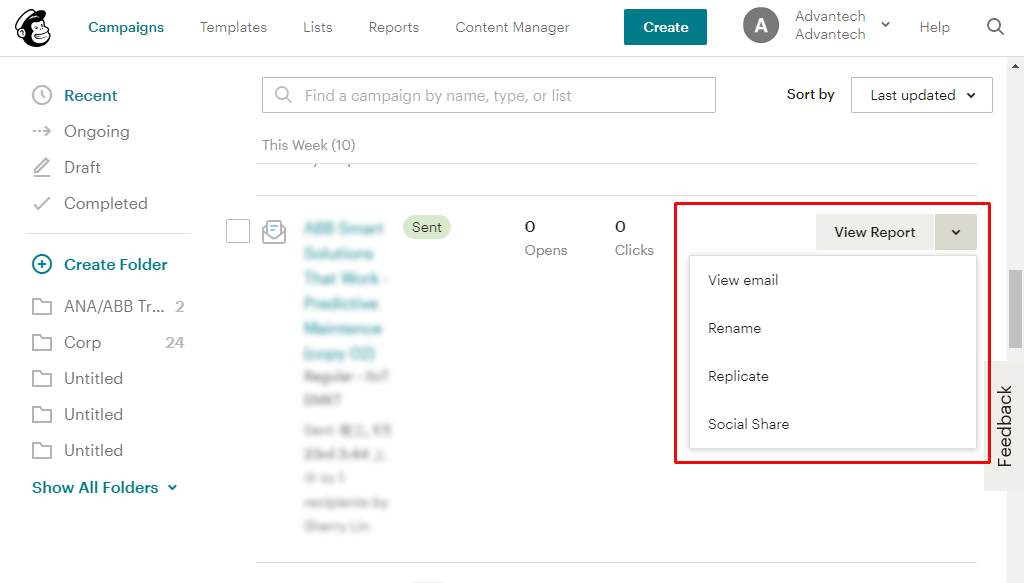
5. Click to access to the Report page and find the "View email" link on the page
6. Please click on the "HTML Source" tab
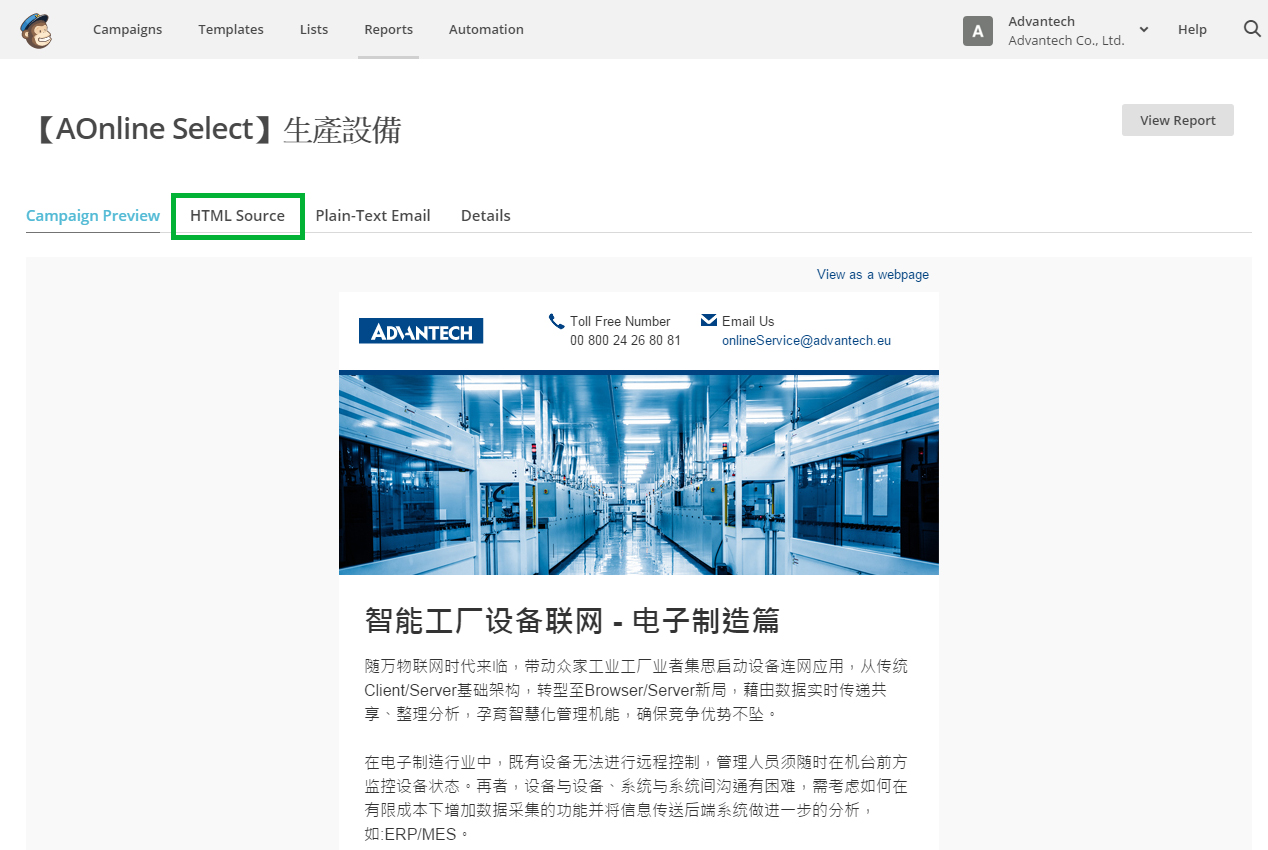
7. Select all HTML codes (Ctrl+A) and copy it (Ctrl+C)
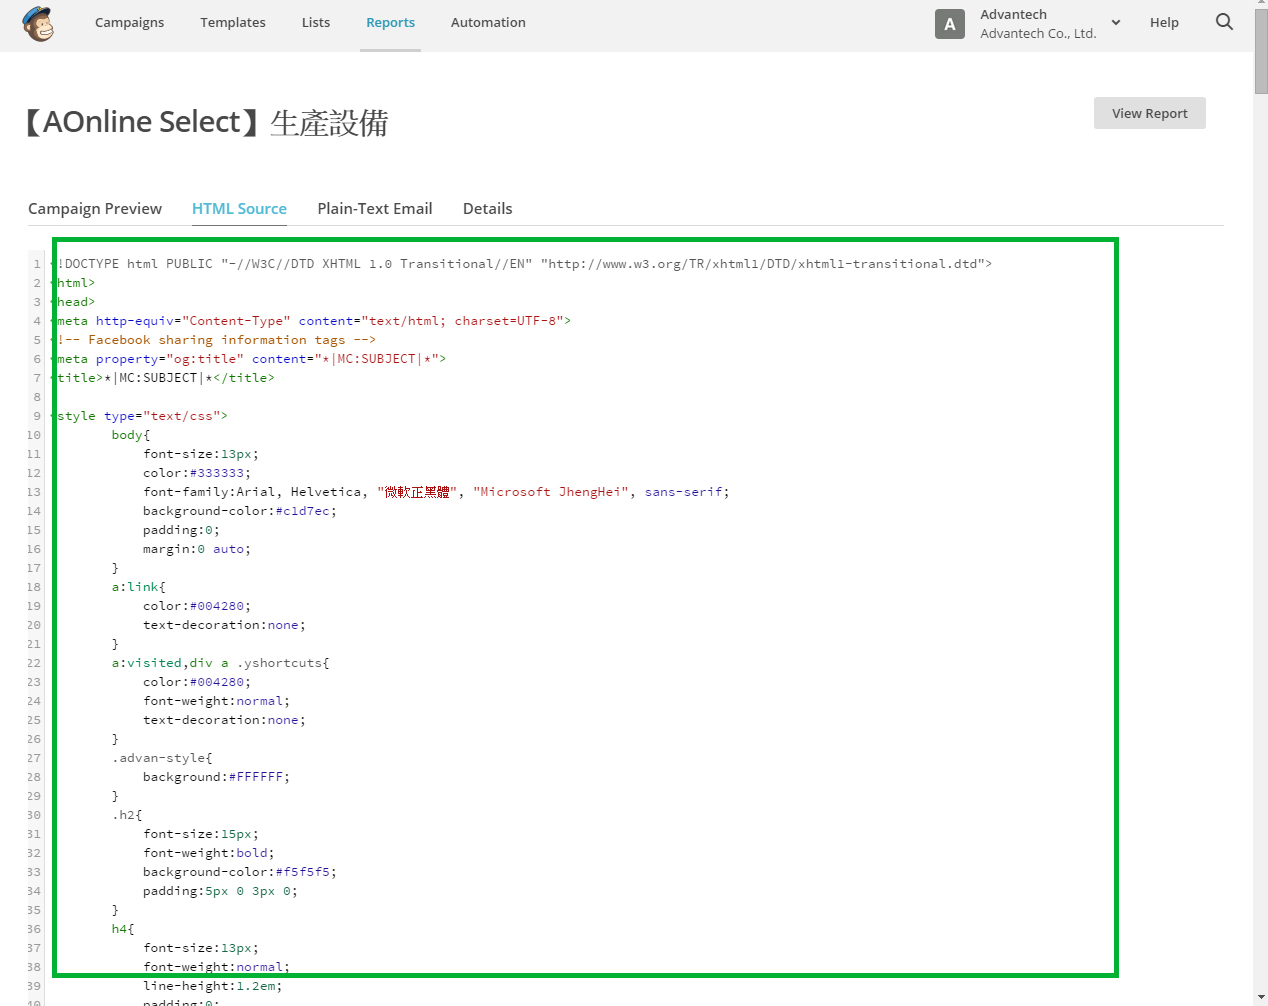
8. Open a plain text editor like "Notepad" (Office Word or any formated text editor are not recommened)
9. Paste the HTML code (Ctrl+V) to the new note
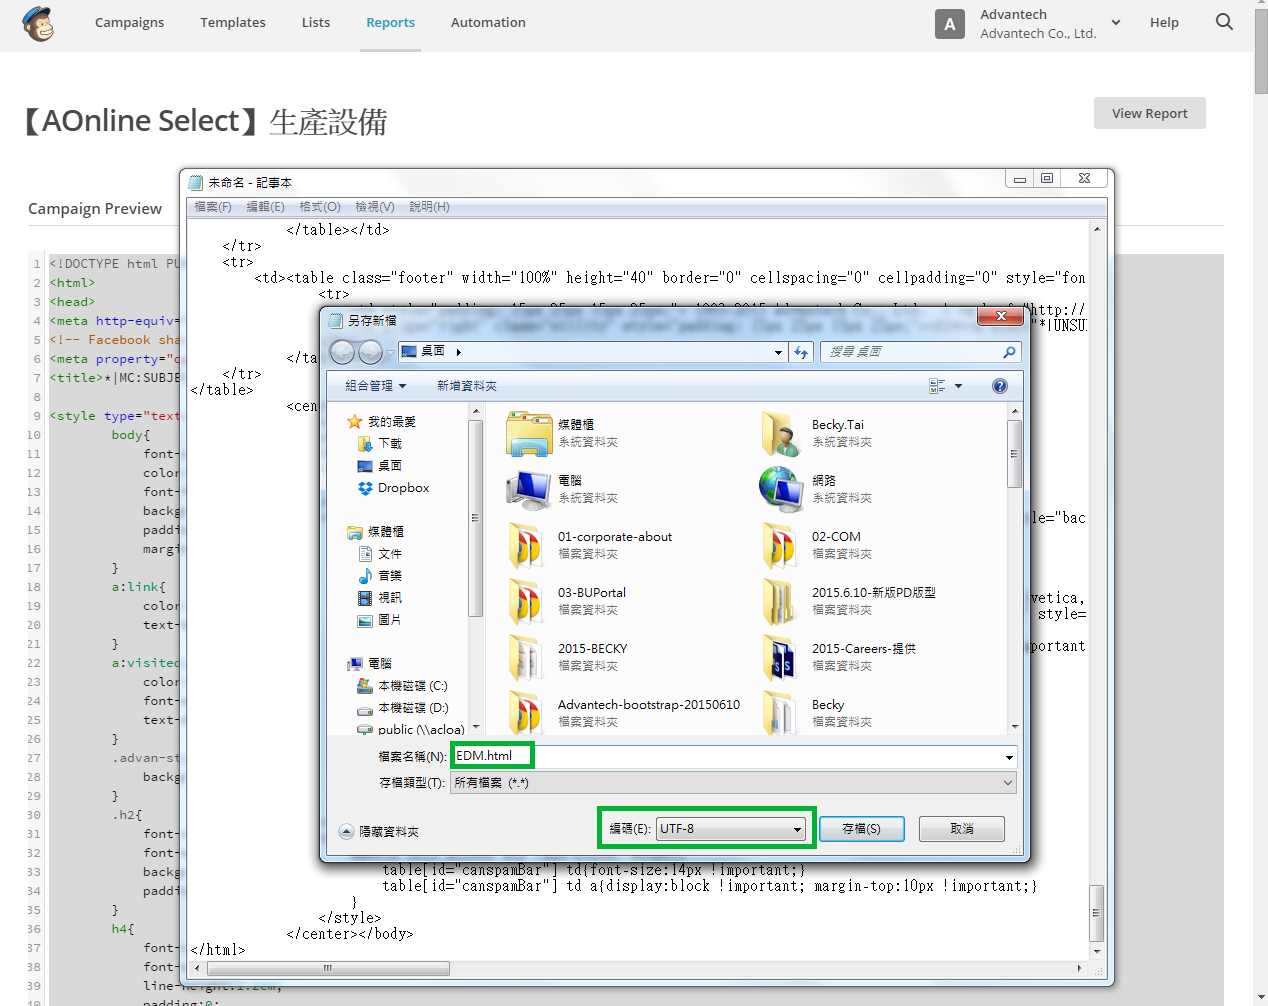
10. Save the file by type in the file name and file extension (.html)
11. Please remember to set the coding as "UTF-8"
12. Save the file
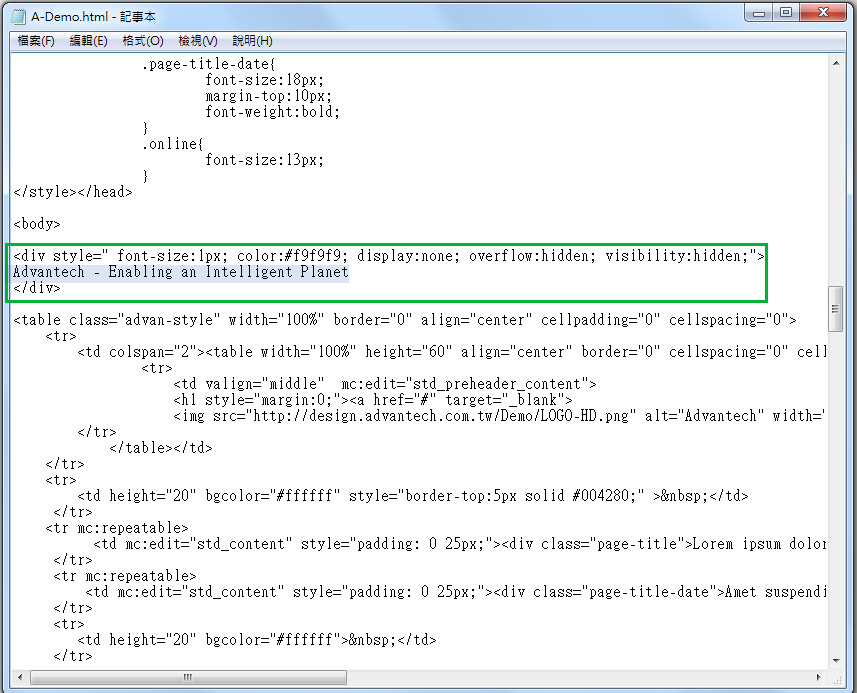
How to edit my eDM's preview text?
Preview text is a snippet of copy pulled in from the body of your email and typically displayed underneath the from name and subject line in a subscriber’s inbox. It is alternatively referred to as snippet text or a preheader

To edit the preview text, please follow the steps:
1. Open the HTML file from a notepad or text editor. ( To learn how to save the eDM in HTML format, please refer it here )
2. Find the sentence "Advantech - Enabling an Intelligent Planet" by using Ctrl+F
3. When the sentence is found as image shown below, edit the text and save the file
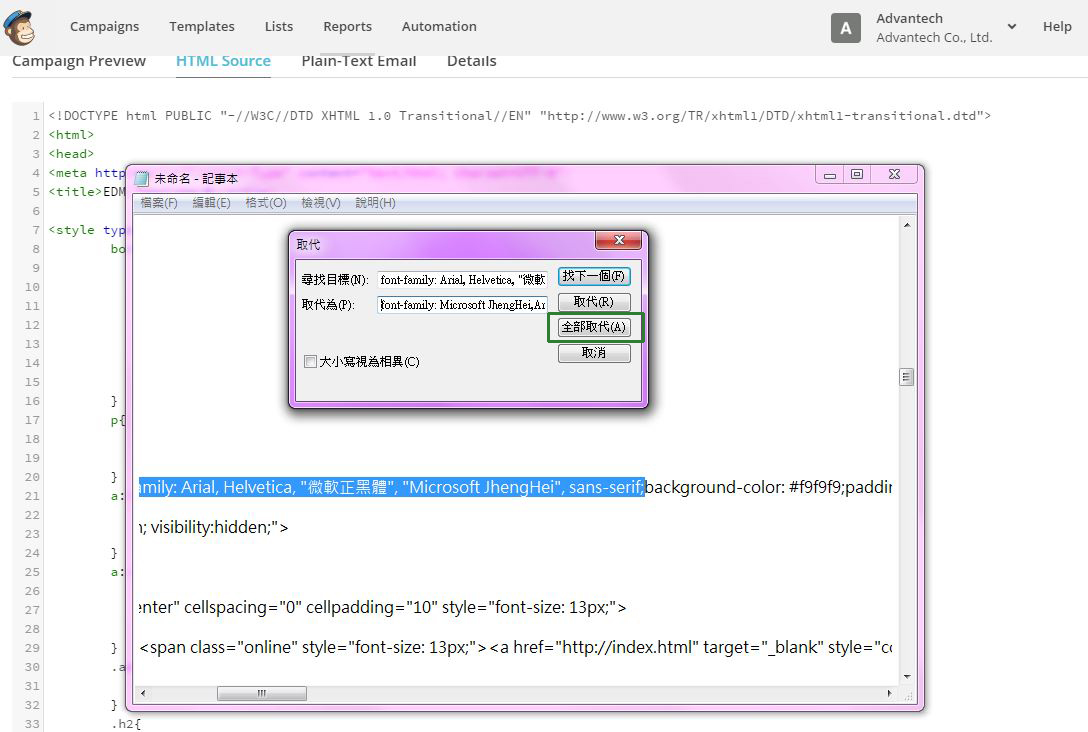
How can I change the preset fonts in my eDM?
To change the preset fonts in the HTML file, please follow the steps
1. Open the HTML file from a notepad or text editor. ( To learn how to save the eDM in HTML format, please refer it here )
2. Open the "Find & Replace" dialog by using Ctrl+H key from your keyboard
3. Copy the current fonts (font-family: Arial, Helvetica, Microsoft JhengHei, sans-serif;)
4. And paste it into the "Find" field
5. Please enter the fonts that you like to replace with into the "Replace" field
6. Click "Replace all" and save the file
Note: For the Chinese-Traditional / Chinese-Simplified / Japanese / Korean fonts, please refer to the table below,
| Languages | Fonts |
| Chinese-Traditional | font-family: Microsoft JhengHei, Arial, Helvetica, sans-serif; |
| Chinese-Simplified | font-family: Microsoft YaHei, Arial, Helvetica, sans-serif; |
| Japanese | font-family: Meiryo, Arial, Helvetica, sans-serif; |
| Korean | font-family: Malgun Gothic, Arial, Helvetica, sans-serif; |
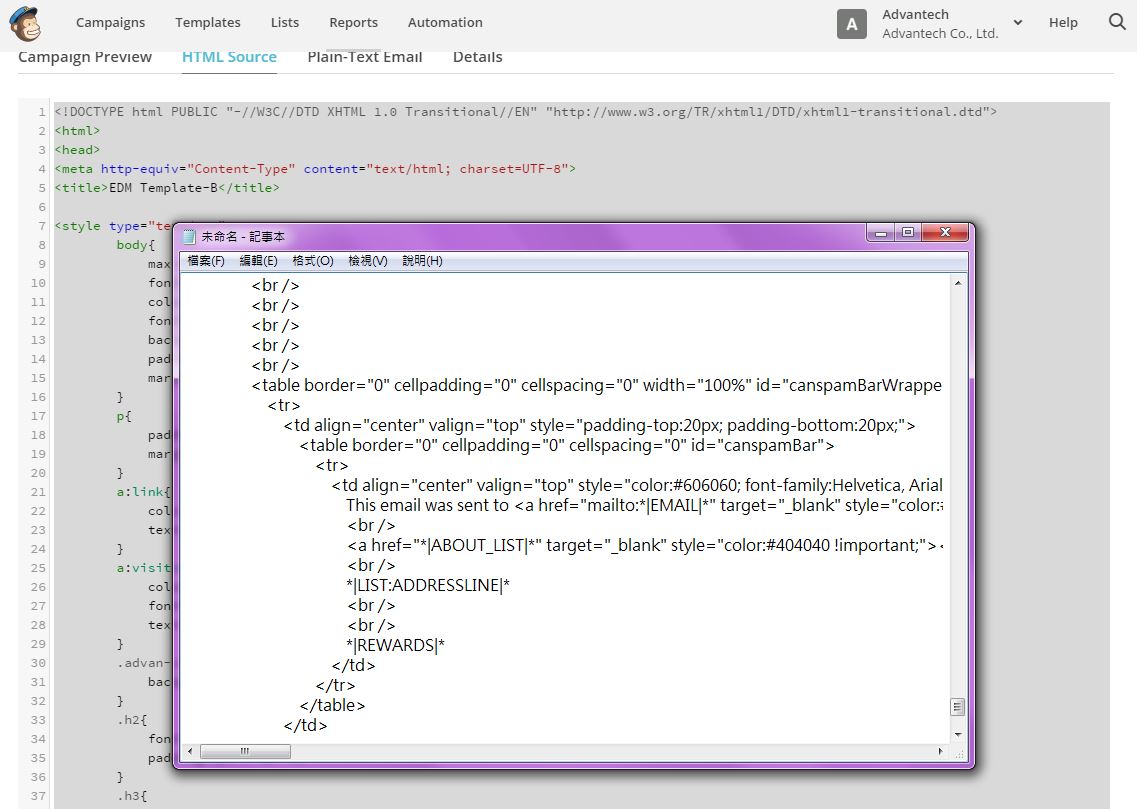
How can I remove the mailChimp footer block in my eDM?
As part of mailChimp's terms of use, a footer block with sender's contact information will automatically add to the bottom of every eDM
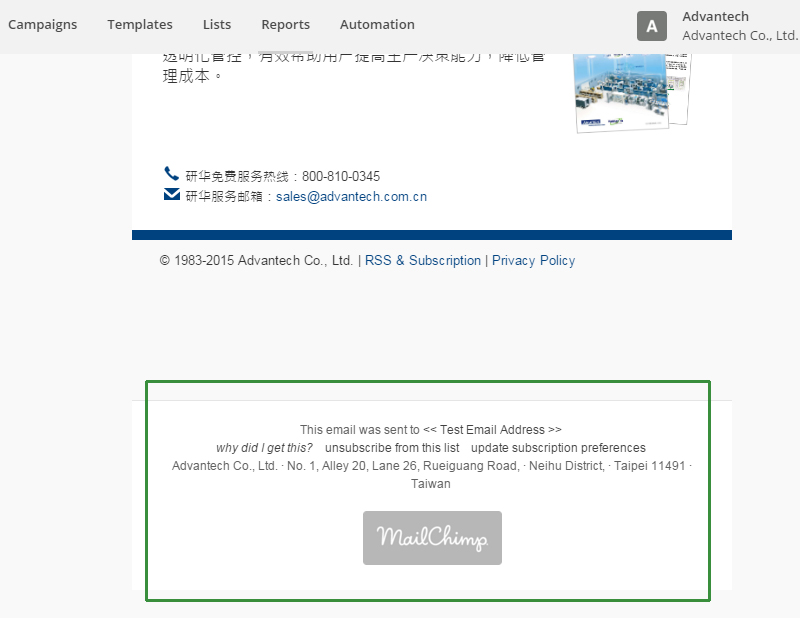
To remove the footer block, please follow the steps
1. Open the HTML file from a notepad or text editor. ( To learn how to save the eDM in HTML format, please refer it here )
2. Find the code, "‹center›...‹/center›" from the bottom of your HTML file
3. Select the codes as the below image, and delete it

5. Please save the file, and open it from a web browser to make sure the footer block is successfully removed

Getting start with lists
To create a new list in your Mailchimp account, follow these steps.
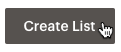
1. Navigate to the Lists page, and click Create List
2. Click Create List in the grey box appear.

3. Type in the List details in the fields provided.
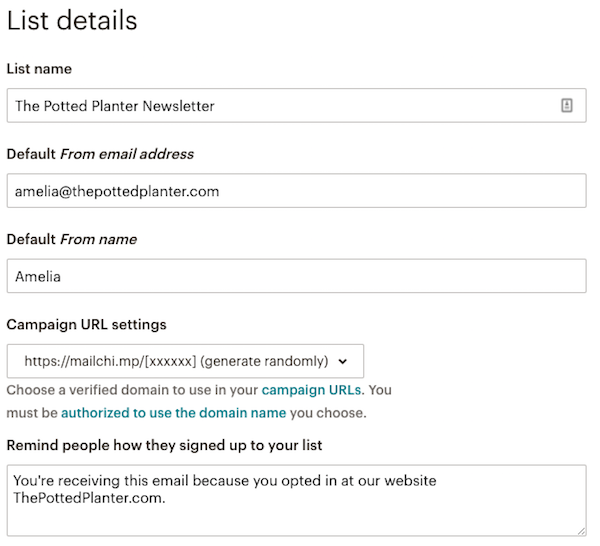
4. When you're finished, click Save
After you create a list, you'll be able to add new contacts to it, to add a single email address to a list, follow these steps.
5. Navigate to the Lists page, Click the name of your list.
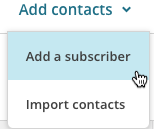
6. On you list page, click Add contacts, and choose Add a subscriber from the drop-down mneu
7. Type in the subscriber's information. It's not required to apply tag as shown in the image below.
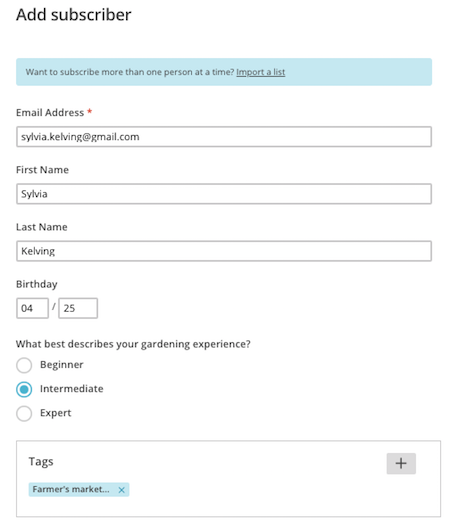
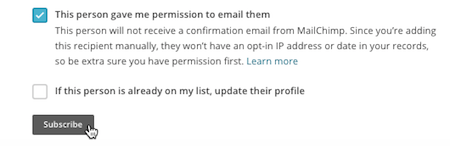
8. Make sure to check the This person gave me permission to be added to my list box. When you're done, click Subscribe
9. On the campaign setting page, you can choose your list as the recipients
